Working with your Spring Boot application in IntelliJ
Working with a Spring Boot application in IntelliJ is not difficult, as IntelliJ is designed for this scenario. However, there are a few things to consider that will make our life easier.
Import your sources
In order to add our newly created Spring Boot application to Intellij, we can use the import function to create the project. This function is available either in the initial popup or, if we already have an opened project in IntelliJ, under File → New → Project from existing sources. A project in IntelliJ can include several applications (so-called modules). In case we want to add our source code to an existing project, we can do this with File → New → Modules from existing sources.
 ▴ Import project from existing sources
In the popup we select build.gradle (Gradle), build.gradle.kts (Kotlin) or pom.xml (Maven) - IntelliJ will then automatically recognize everything else. If we have several pom.xml in our project, we select the top one.
Project settings
With a right click on the newly imported project and Open Module Settings we can edit the project-specific settings. In case it's not already selected, we have to provide and select the JDK for Java 17, as this is the minimum requirement for Spring Boot 3.
 ▴ Selecting the JDK for our project
In the general settings under File → Settings there is also a preference for Gradle which I prefer to adjust. Under Build → Build Tools → Gradle the two settings "Build and run using" as well as "Run tests using" can be changed to IntelliJ. That will make the log output during testing and development more consistent.
 ▴ Adjusting gradle preferences
Please also check out this article for the proper setup of Lombok in IntelliJ.
Run Configuration
Now our Spring Boot application is ready to be launched. The build tasks are listed in the Gradle or Maven section in IntelliJ - we could start the application with bootRun (Gradle) or spring-boot:run (Maven). We could also start our application with our own RunConfiguration. For this purpose we create a new configuration of the type "Application" under Run → Edit Configurations - the settings for our application are as follows.
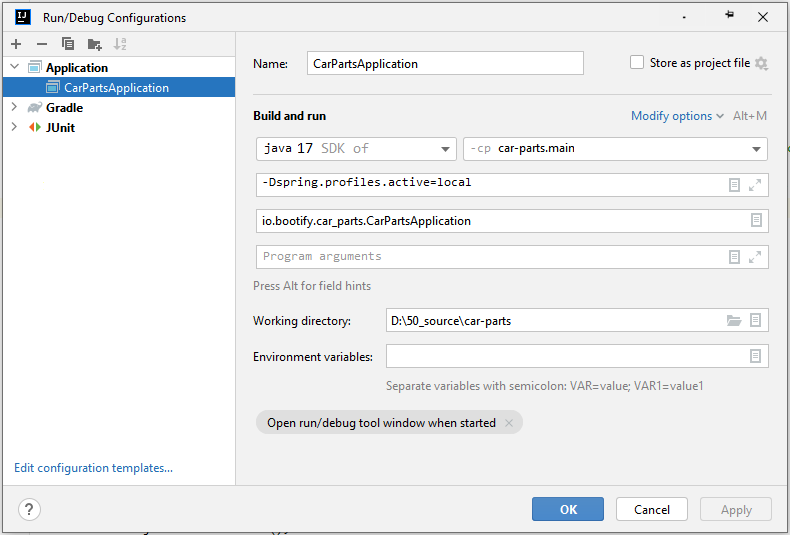 ▴ Creating a run configuration for our Spring Boot microservice
In order to add our custom profile to the VM options, we have to activate it in the dropdown behind "Modify options" first. If we have a multi-module application, we select the hightest module ("web.main") at "Use classpath of module". In this way, we have all references modules ("base") included as well.
Now we can start our application from IntelliJ!
After configuring our database connection, our application is available at http://localhost:8080/.